1974 Honda CB750 Four K4
Mechanical Service with some Cosmetics
Owner & Writer: Randy Creel, Jr., Owner & Restorer of Randy's Cycle Service & Restoration
Revitalize the Spirit & Beauty of your Classic Bike
Located in beautiful Central Virginia since 2001
8175 Black Walnut Run Road, Rhoadesville, VA 22542 USA
Service by Appointment ~ Closed Sunday & Monday
Email: info@rcycle.com
The Mid-Atlantic Region Premier Restorer of Vintage Motorcycles
Website created and managed by Ursulina Creel. Comments? Send to info@rcycle.com
This page was last updated on: August 6, 2013
Website & video content is the property of Randy's Cycle Service & Restoration & may not be used for any reason without prior, written permission.
COMMENTS: This page is an ongoing write-up of Randy's mechanical & cosmetic service to the bike he'll personally be riding starting the spring/summer 2010. Write ups - some technical some personal - will be posted along with pictures & a video of the progress. Notifications of new entries will appear on Facebook, so please join us on Facebook by clicking on the icon above.
Blog Entry 6: Posted June 8, 2010
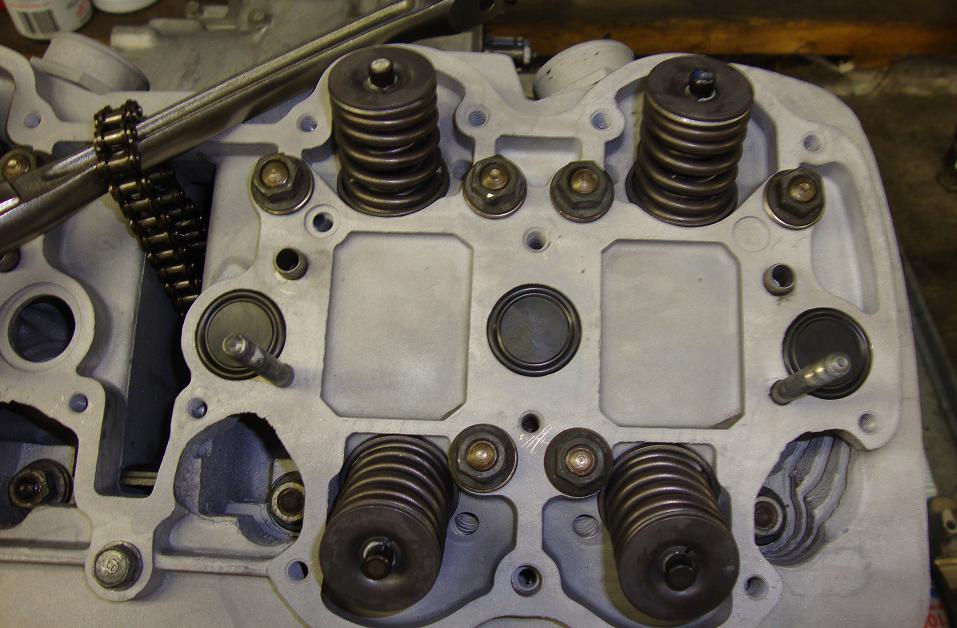
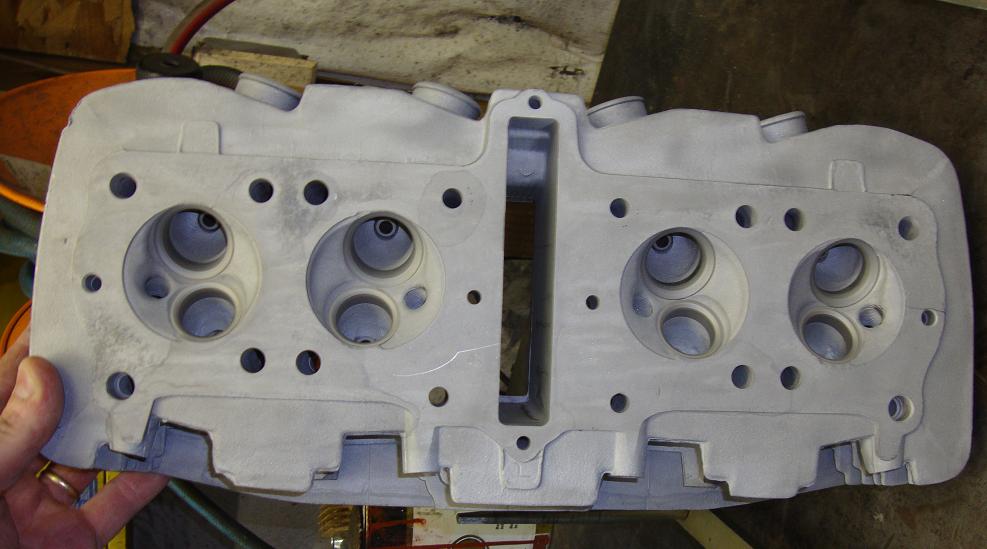
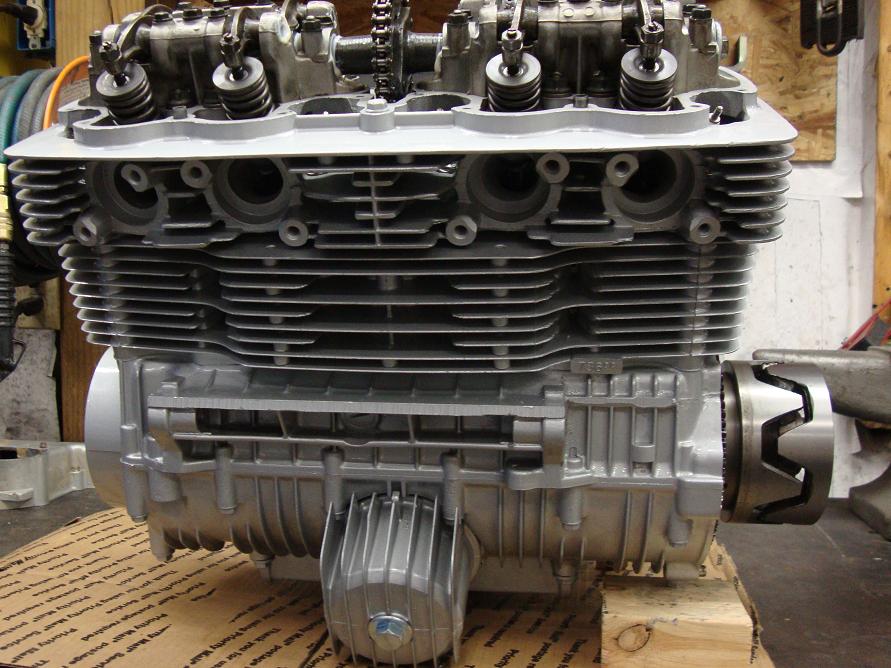
Further delving into the CB750 engine, the cylinder head was fully inspected and while the engine is a low-miler, and didn’t really appear to need any attention, I had a few doubts about the valve stem seals. I didn’t see any signs of oil consumption via that route, but anytime something has sat for that length of time, I question any rubber parts’ ability to do its job very well or for very long once put back into use. With that said, I disassembled the cylinder head and confirmed my suspicions. The valve stem seals visibly looked good, but were hard as a rock. Of course they were replaced and the valves and guides checked at the same time revealing that they were perfect. I also did a valve spring test and found the tension and installed height all fell right within the factory specifications. Not bad for an engine that’s been sitting for an unknown amount of time! A quick de-carboning of the combustion chambers and valves and everything went back together looking good and with the peace of mind of knowing that there would be no valve seal issues or oil consumption problems down the road. This was also an opportune time to replace the exhaust sealing rings that are located behind the adapters that the pipes clamp onto. These are a copper clad seal which is also prone to leak exhaust and leave a nice sooty mess all over the front of the engine after some miles when they do give up. They are also a pain to change on the bike in the frame, so now while I can see them they are getting replaced.
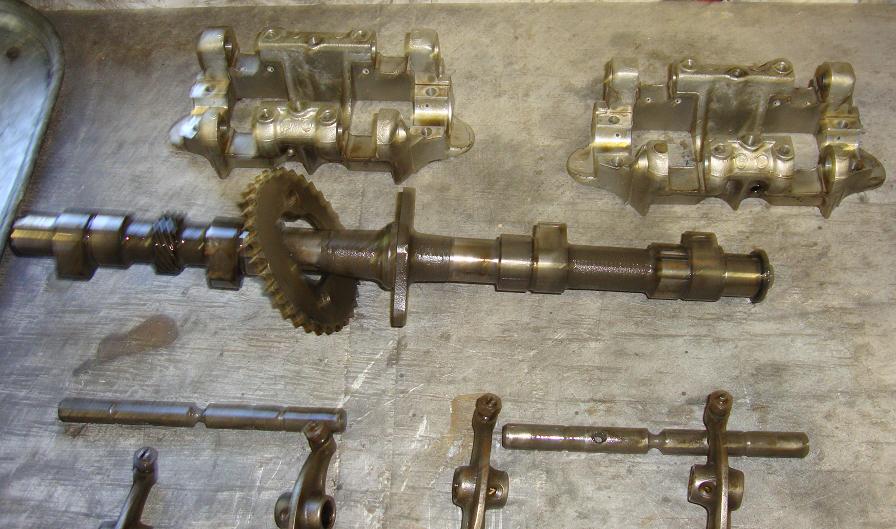
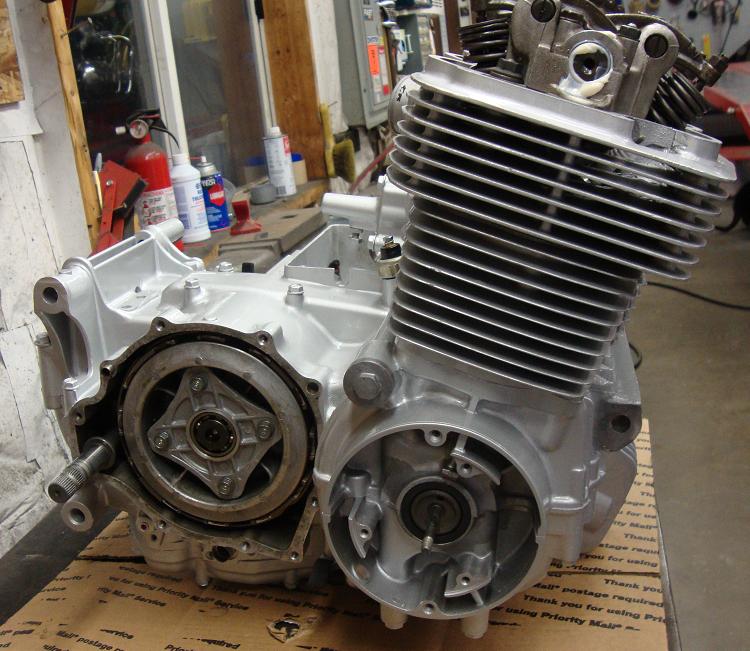
Once bolted back on and torqued to proper specs, the cylinder head was ready to receive the cam stands, the aforementioned sealing discs, the camshaft, rocker arms, and timing chain. The latter is usually always a concern on many CB750 SOHC engines as the guides were prone to premature wear and the manual chain tensioner rarely saw any checking or maintenance. This led to either an extremely loose chain, noisy operation, or deep grooving of the chain guides. Not so in this case. The guides were absolutely free from any wear, and honestly, looked nearly as good new ones fresh out of the package. This is the first 750 I’ve seen that was this good. With regular maintenance and good quality engine oil, they should hold up well for a long time to come. Seems once again I was fortunate enough to have chosen an excellent power plant for my project. I see many happy miles ahead.
I've seen many SOHC 750’s that have been previously “overhauled/rebuilt” but often find one little but very important item that often gets overlooked & left out, the o-rings that control the oil flow and return from the cylinders to the cylinder head and then on to the camshaft carrier. On early engines, there were only four of the o-rings at the cam stands on the pressure side of the system, but later engines also use o-ring type seals on the head studs to direct the newly drilled oil return holes back down to the bottom end again. If forgotten, the head gasket will seal for a few hundred miles, but soon, the cylinder head will begin to leak here and what starts as a small dribble will soon turn into a torrent. More severe is the omission of the four o-rings on the cam stands. Leave those out and oil pressure to the camshaft which lubricates it will be diminished resulting in a badly scored or even seized camshaft. There is also a calibrated orifice in the oil feed to each side of the cam stands. This cannot be left out, although again I’ve seen this done more than once, and the resulting oiling problems were generally lethal to the valve gear. Add to this that you cannot remove the cylinder head in the frame of these bikes and you have a major problem to correct later if it even can be. Vigilance, cleanliness, organization, and care are essential in proper assembly of a Honda 750.
All buttoned up on top now, I did the valve adjustment before installing the valve cover. This is just for ease. The valve cover was not very pretty to begin with, nor were any of the external covers, after having sat around for a number of years. Surprisingly, they weren’t corroded or damaged, but they all had those little spider web patterns on them and a dull gray finish that unprotected alloy tends to oxidize into. The cases, cylinders, and head also had lost much of their original silver color to time, so while the engine was on the bench it needed a cosmetic refresh too. Plus a good cleaning between all the fins couldn’t hurt either for better cooling. The cases were stripped clean and then prepped for paint. The original silver finish being applied afterward and all of the bright work was polished to a mirror finish. For proper polishing, all of the covers were first removed, cleaned thoroughly, bead blasted, and painstakingly polished to a nice luster. Polishing is not my favorite job as it is hot and very dirty, but the end result is well worth it. I must say it is now a very attractive 750 once again and suitable for “framing.” With all new hardware for the covers in the original cad plated, pan head screws it looks like a 750 should.
Next update: Back in the frame and a set of carburetors . . .
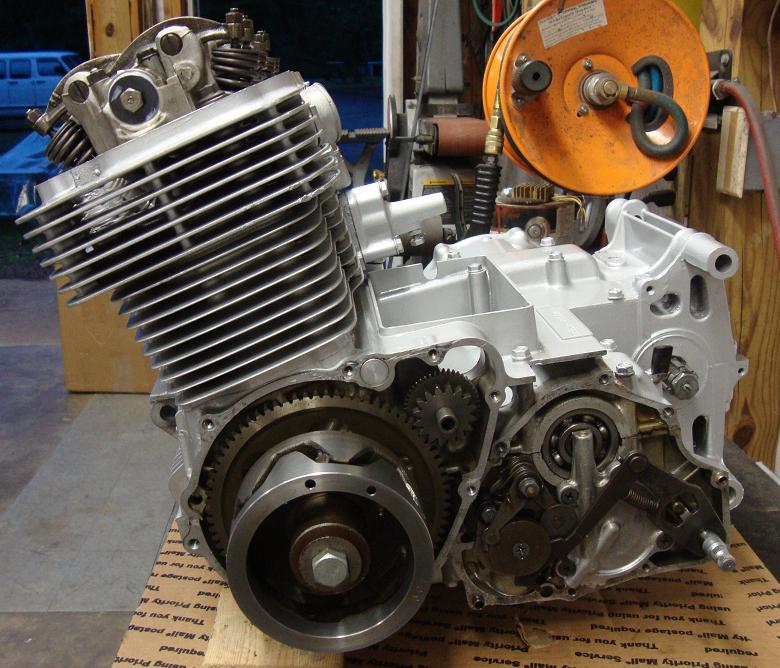
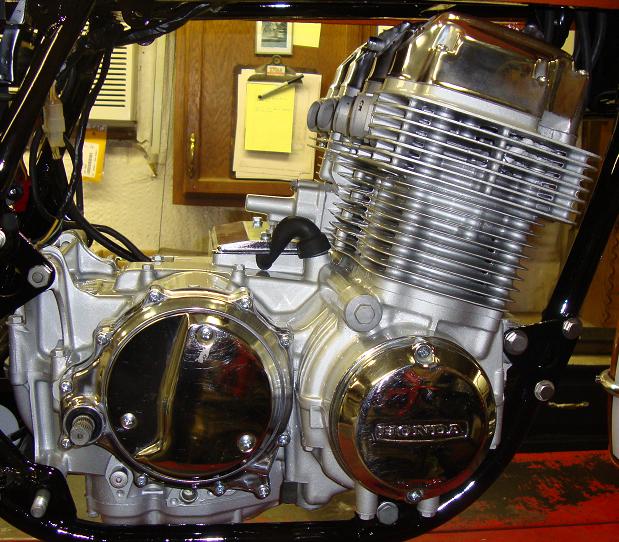
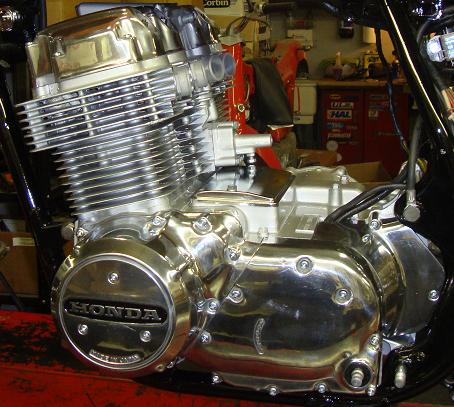
Pictures of the engine after paint
Polished, painted & beautiful
Valve guides
This is the kind of clean that's standard in all our engine rebuilds