1974 Honda CB750 Four K4
Mechanical Service with some Cosmetics
Owner & Writer: Randy Creel, Jr., Owner & Restorer of Randy's Cycle Service & Restoration
Revitalize the Spirit & Beauty of your Classic Bike
Located in beautiful Central Virginia since 2001
8175 Black Walnut Run Road, Rhoadesville, VA 22542 USA
Service by Appointment ~ Closed Sunday & Monday
Email: info@rcycle.com
The Mid-Atlantic Region Premier Restorer of Vintage Motorcycles
Website created and managed by Ursulina Creel. Comments? Send to info@rcycle.com
This page was last updated on: August 6, 2013
Website & video content is the property of Randy's Cycle Service & Restoration & may not be used for any reason without prior, written permission.
COMMENTS: This page is an ongoing write-up of Randy's mechanical & cosmetic service to the bike he'll personally be riding starting the spring/summer 2010. Write ups - some technical some personal - will be posted along with pictures & a video of the progress. Notifications of new entries will appear on Facebook, so please join us on Facebook by clicking on the icon above.
Blog Entry 12: Posted August 1, 2010
The CB 750 is now officially at the 2,000 mile mark! Thankfully, those 2,000 miles have been fairly uneventful in terms of mechanical problems, but eventful in some of the best road trips and rides in quite a long time for me. A couple thousand miles may not seem like a lot to some of the more seasoned riders out there among us, and when you consider I’ve probably logged near a million miles by motorcycle (I do this for living and hobby) so 2,000 may seem pretty small in scale, but to do this on a bike I built to my specifications, and logged those first miles, it means a lot. Plus, its my bike. :) Much of the riding I’ve done in the past 10 years has been on everyone else’s machine when it needed repairs or fine tuning. In other words, work riding. But I'm not complaining as I have had an opportunity to experience some of the finest & coolest machines out there & in the process do a bit of fine tuning to my preferences too.
I’ve discovered a few things that are helpful to my riding style and comfort, and have decided to do a few upgrades to the 750 to make it even more my own. The first thing, I must say, is that I am an information junkie. Hence my love of the internet and all that it entails, but even on the road, where I refuse to have a radio, clock, or computer on my bike, I still want to know what it is doing both inside and out. Several very key systems in my opinion need more monitoring that just my ears vibration, or a warning light.
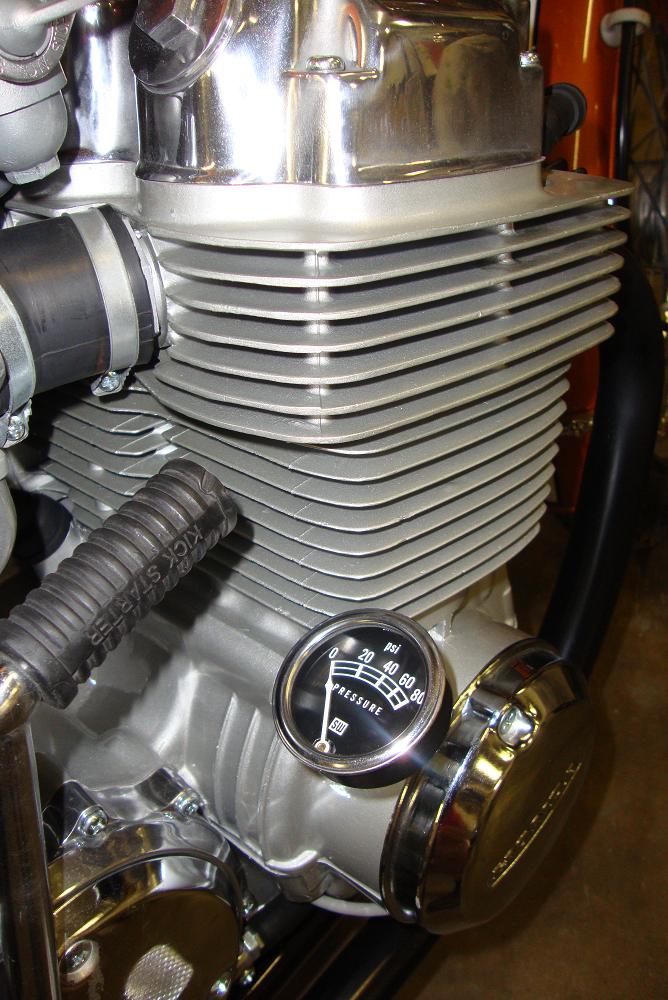
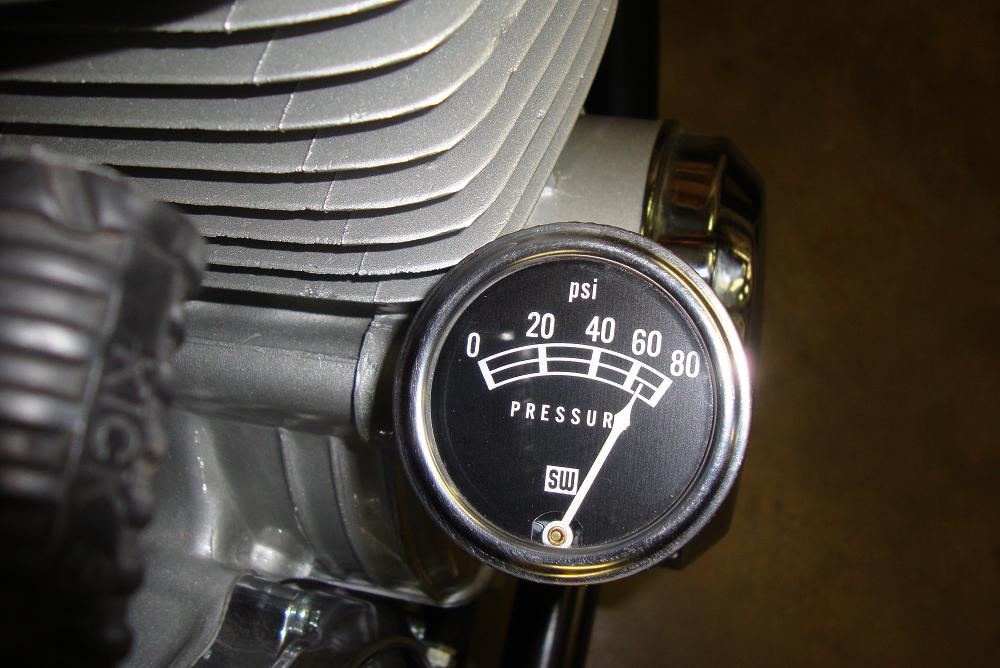
The first and most important system is the function of the engine oiling system. If it stops, so do you and the bike, and that's almost instantly. The CB750 has an electric sending unit and light which works fine in stock form, but doesn’t tell you much more than yes or no in the oil pressure department. Add a real mechanical gauge and you have some real-time info. Honda conveniently left a nice port on the right side of the engine for attaching just such a gauge and it comes right off the most critical part of the engine which is the main bearing oil feed gallery. The heart of the engine, if you will. If there is a problem in the oil feed, supply, level, oil quality or anything else, the oil pressure gauge will reflect this to a vigilant operator. Normal cold oil pressure on a CB750 engine using 20W50 oil is around 60 psi and once good and hot around 15-20 psi at idle. That gives a good baseline to be able to keep an eye on things at any given time. I already had an adapter and 90 degree fitting for a CB750 engine, so after a bit of polishing, I installed them and added a Stewart-Warner pressure gauge. It’s a classic style with a black face and white needle that looks like it belongs. I have discovered that it doesn't like moisture and likes to fog over inside the glass, so that will need some attention.
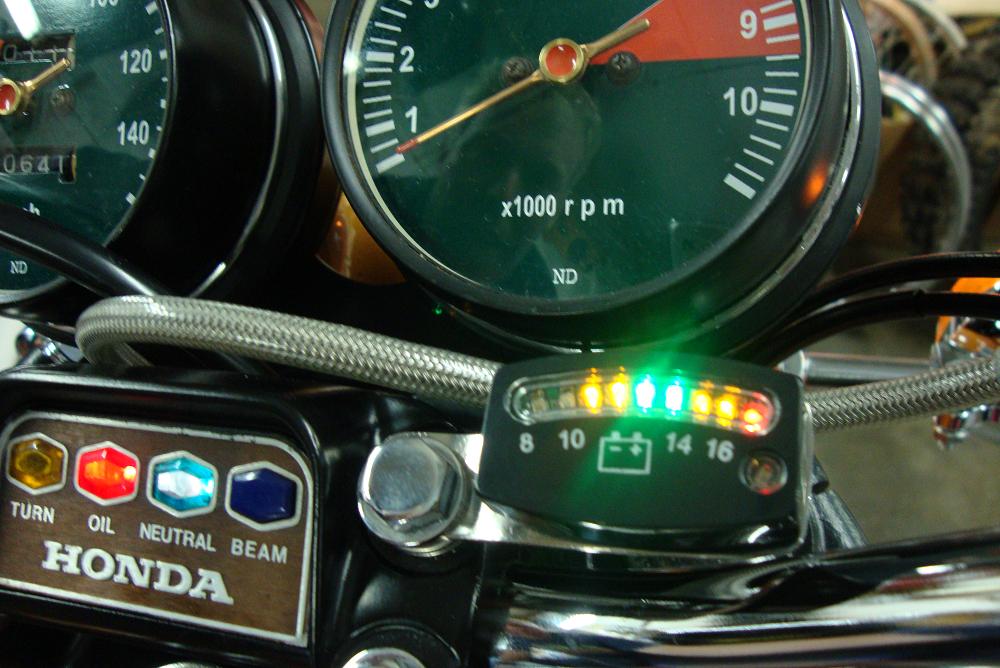
The second system that can leave you along the road in short order is the charging system. In that area, Honda didn’t provide any input to the rider in terms of whether it was working other than a total battery failure when it did stop. Because of that, I figured a little more info would be handy. Most vehicles use a larger gauge for monitoring the charging system and space is at a premium on the 750 dashboard area, so to get around that I did a little digging. For around $40, Kuryakyn makes a very nice little LED charging system monitor that is about 1 inch wide and 3/4” tall. It comes in both a chrome and black version (I chose black) and it is small enough to be unintrusive once installed, yet provides the necessary information. It’s basically just a two wire connection to the electrical system, and the mounting is a two sided tape peel and stick affair. I wanted something a bit more custom, so I used a nice piece of stainless steel to make a very small bracket, then polished it before mounting it to one of the handlebar clamp bolts.
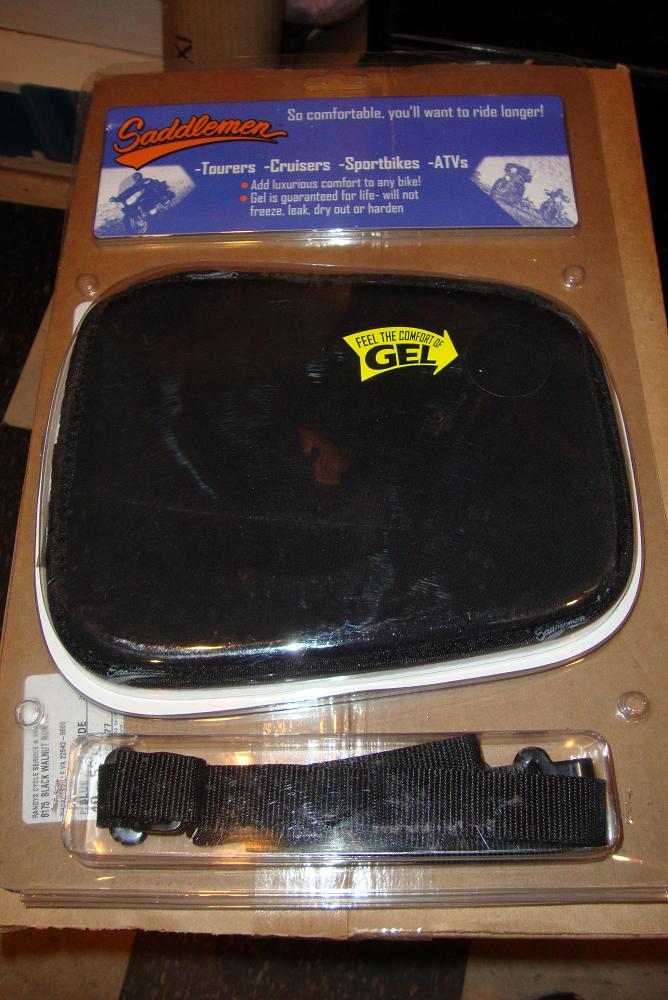
Once those items were attended to, I figured that a little comfort was in order. As mentioned before, Honda seats of the era leave much to be desired as far as padding is concerned, and as such they benefit from some augmentation of that easily compressible foam. My first solution was a surface mounted gel-pad. I’ve used the gel-pads many times inside the seats I’ve recovered for myself or my customers, but never as an add-on like this. It works, but has a few issues: First, it can move around as the attachment system is really just four straps and hooks. Second, it elevates you on the seat by about ¾”. That doesn’t sound like much until you actually try it and find that your riding position is not what it was before. Third, the pad had a cover over it made of a spandex type material that isn’t particularly breathable. In the routine 90+ degree heat & 60% humidity we get around here in the mid-atlantic area, that doesn’t work too well. My next solution will be to actually pull the cover on the new seat and cut into the foam, and add a raw gel pad there as I normally have done in the past. Lesson learned.
One other small but very useful item I had on my last CB750 was a Vista Cruise. This one needed it too. It’s called a cruise control, but it really is nothing more than clamp with a thumb lever that captures the throttle sleeve of the twist grip. Not a complicated thing, it provides much relief on those long rides when you just need to relax your right hand for a moment and still keep moving. It too has been installed and is already much appreciated.
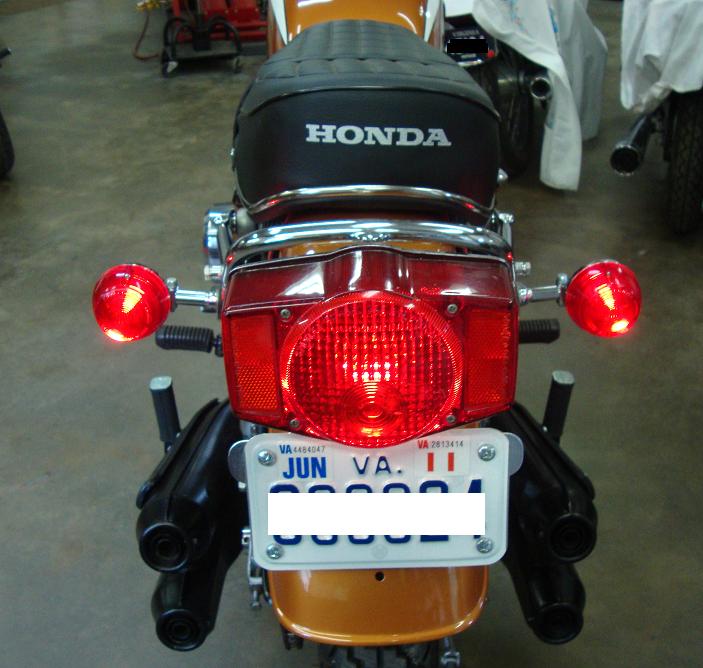
Lastly, in the safety department, I added two red lenses to the rear signals. I’m mot sure which Honda models had these red lenses from the factory, but I suspect it was the overseas market machines. What they provide is the ability to use the rear signals as both signals and auxiliary marker lights. In my opinion, anything that makes you more visible to others when riding isn’t a bad thing, and in this case it looks as if the bike came that way, so all the better. I did have to use two front turn signal housings with the dual contact sockets that allow for an 1157 type dual-filament bulb in order to do this. With a couple of diodes, I may also incorporate the brake function into them at some point in the future. If I do, I’ll post up the details.
In this 2,000 miles, I have had a few very minor issues: First, as mentioned was the erratic speedometer. After disassembling it and finding nothing serviceable, I grabbed another off the shelf, swapped out the new face, set the mileage, and installed it. It lasted about 30 miles into my next ride before the needle dropped to zero. That was at the 650 mile mark. Once again disassembling it, I repaired that issue and at 2,000 miles its functioning perfectly now. Second, was a bad spark plug cap that very intermittently would cause a misfire at tip-in acceleration. The last, and totally my own fault was the drive chain. It seemed to constantly need adjusting from day one and I religiously lubricated it before each ride. By the 1,500 mile mark it was already at the halfway mark for its service life. At 2,000 miles it was worn out. Here is where the “my fault” part comes in: Cheap drive chains are that way for a reason. I had one of those "bargains" lying on the shelf that hadn’t been used and I was reluctant to sell, but I figured “Hey, I’ll just throw it on my own bike someday.” The result was a chain that lasted long enough to prove why some things are so cheap. I know better, but I always think this time may be different. Thankfully it didn’t decide to part with the sprockets while enroute to some faraway destination. A new and quality Tsubaki chain now resides in its place.
Next update: A video of the “Loop” ride ...