1974 Honda CB750 Four K4
Mechanical Service with some Cosmetics
Owner & Writer: Randy Creel, Jr., Owner & Restorer of Randy's Cycle Service & Restoration
Revitalize the Spirit & Beauty of your Classic Bike
Located in beautiful Central Virginia since 2001
8175 Black Walnut Run Road, Rhoadesville, VA 22542 USA
Service by Appointment ~ Closed Sunday & Monday
Email: info@rcycle.com
The Mid-Atlantic Region Premier Restorer of Vintage Motorcycles
Website created and managed by Ursulina Creel. Comments? Send to info@rcycle.com
This page was last updated on: August 6, 2013
Website & video content is the property of Randy's Cycle Service & Restoration & may not be used for any reason without prior, written permission.
COMMENTS: This page is an ongoing write-up of Randy's mechanical & cosmetic service to the bike he'll personally be riding starting the spring/summer 2010. Write ups - some technical some personal - will be posted along with pictures & a video of the progress. Notifications of new entries will appear on Facebook, so please join us on Facebook by clicking on the icon above.
Blog Entry 4: Posted May 17, 2010
As part of this build, I made a decision early on not to go completely over the top by replacing everything & re-chroming to end up with a beautiful bike but one I’d be afraid to actually use. After all, the point is to ride this bike no matter the weather or road conditions, enjoy that ride, and if it doesn’t see a water hose for a few days (or weeks) afterward then it’s no big deal.
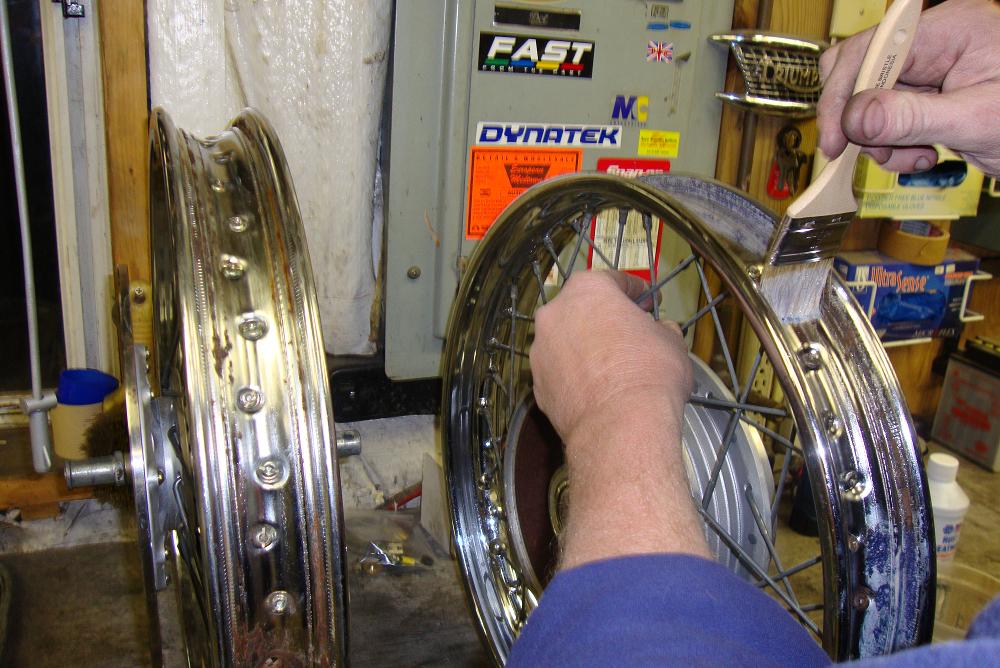
The wheels are an example of this plan. Usually, when we do a full-on restoration, the wheel rims are either replaced or re-chromed, the hubs stripped and polished or repainted as necessary and new spokes installed. The wheel is then re-laced and trued to produce a brand new wheel. In the case of my CB, I’d put aside a couple different sets of wheels over the last few years I’d found either at swap meets or in some parts deals that happened to come my way, with just such a project in mind. When I retrieved them from storage they were still covered in road grime from many years ago and fortunately it acted as a bit of a preservative. The front wheel still had some original Cosmoline on the spokes after all those years! The rear had enough chain grease on it to even keep the cadmium plating on the spokes in fairly good shape. The front had a pretty decent shine too under all the filth and once washed & thoroughly cleaned thoroughly and polished, both wheels would pass for excellent condition, really. Surprising considering Japanese chrome of the time was not known to be very durable or long-lasting. Note me painting on rust inhibitor to the inside of the rims.
Mechanically, there is always the unknown of 30+ years of use or sitting for who knows how long in what kind of conditions. To eliminate that variable, I went ahead and replaced all of the bearings, and seals in the wheels and gave the rear brakes a good review. The bearings in the rear wheel were somewhat notchy, but more importantly they were original and hadn’t seen any grease since they’d left Japan back in the 70’s. I don’t think it’s a safe prospect to have a dry wheel bearing remind you of its presence on a dark lonely road far from home, or perhaps at freeway speed. Next was lubricating all of the brake pivot points, adding a new set of rear shoes and then checking the wheels for true, plus re-torquing all of the spokes. The effort produced a very nice set of wheels. Now they just needed some quality rubber to round them out. I’ve always had very good experience with Dunlop tires both in mileage and traction so the brand was an easy choice. The model also came pretty easily as well, as I decided on the K70 pattern. I like the look of the vintage tread pattern on a bike of this age rather than a more modern pattern, which in my opinion always tends to look a little too “new” for a vintage machine. Of course, new rim strips and heavy duty tubes were installed at the same time. A quick spin on the balancer and they should ride as smooth as glass now with the confidence of knowing they are safe.
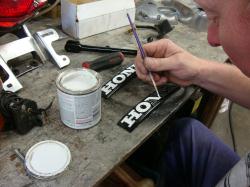
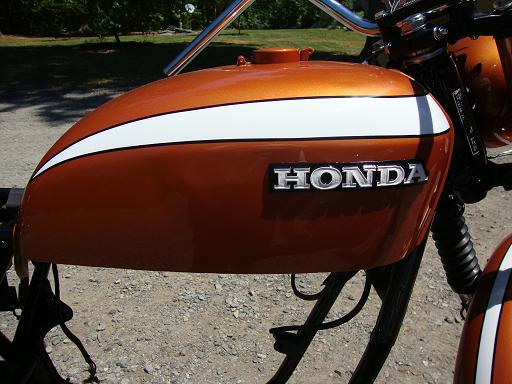
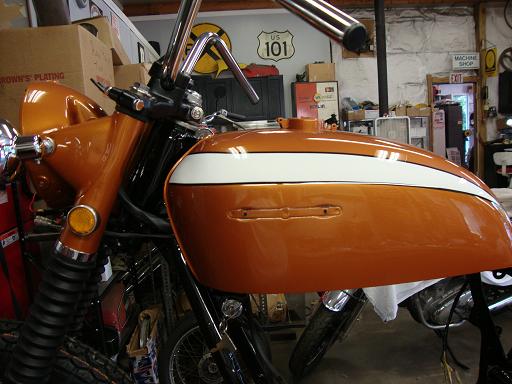
Normally at this stage in the game bodywork isn’t a consideration. That is to say paint/body work is usually the last thing to get done. The reason; to eliminate having to work around shiny fresh paint and risk a scratch or other damage, plus ideas can change mid-build and render the color choice or graphics obsolete. In this project though, I already had my color scheme and idea picked out long before I started, and I really wanted to see it on the tins, so that part of the process was moved ahead a little. The chrome fenders that I had were in poor shape in terms of the chrome, but they were very smooth sheetmetal-wise, so I made a decision to strip the chrome and paint them. I’d never seen a CB750 with painted fenders, so I didn’t know how it would look. I must say though I am pretty happy with the result. I will let you, the reader, be the judge if it suits your taste. I tried to follow the factory stripe on the tank in form, but with my design twist. I’m happy with the result there as well. One idea I also had and executed in the body department was to follow the early pre-71 CB750 scheme and paint the headlight ears and bucket. Again the chrome was pretty well done for on the headlight ears, so that was an easy decision, and I always liked the early CB’s look anyway. To add to that, I even used the smaller diameter reflectors on them too. At some point in the future, I may even scare up a pair of repro early style, louvered side covers with emblems and a smooth air box to round out the early look. (If you know of any for sale, please get in touch (info@rcycle.com) The color is "Cadillac Bronze" and the stripe is a generic bright white with black outline. It has about 4 coats of base and around 6-8 coats of clear. A final wet-sand and buff brought it to a nice deep gloss.
Next update: The engine and lots of it ...
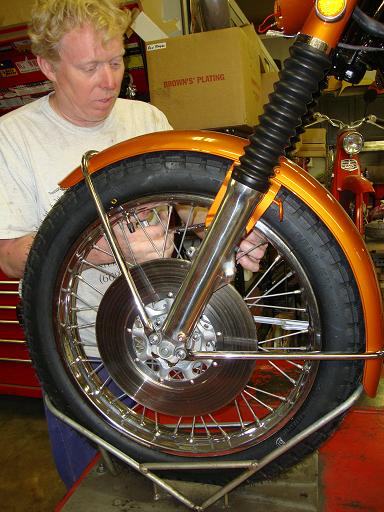
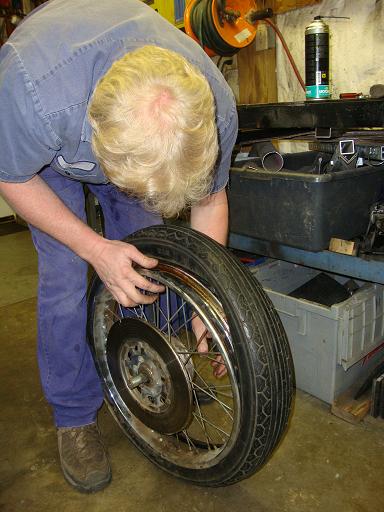
Front tire disassembly
Painting rust inhibitor on wheel rims
Painting the gas tank emblems